Saturday, 7 April 2018

Popup in Xamarin.Forms

Hello Xamarians,

How are you all, Hope all are good. I am here with a new post on (Rg.Plugins.Popup). Popups are very important in mobile apps.

Friends, when I came for the first time to use popup, I was confused about the kind of popup to use and how can I get that into the xamarin forms. I searched a lot on the internet and found a plugin (RG.plugin popup) to design a popup. With the help of this plugin, we can easily create Popup in Xamarin forms. This plugin save a lot of time and effort. In my next post I will tell you about how to apply animation on Rg.Plugins.Popup.


Implementation:-
  1.  Open Visual Studio and select a New Project.
  2.  Now, select Cross-Platform App, give project name and set the project path. Then click OK.
  3.  Select the template as "Blank App" and code sharing as "PCL".

Step-1
Now we can install Rg.Plugins.Popup
  1.  Right click on project then click on Nuget Package.
  2.  Click  browse and then search Rg.Plugins.Popup, select Plugins and  then check projects in which we want to add  this plugin.

Step-2
Now we are going to xaml Code section and  write some button click code in MainPage.xaml
<?xml version="1.0" encoding="utf-8" ?>
<ContentPage xmlns="http://xamarin.com/schemas/2014/forms"
xmlns:x="http://schemas.microsoft.com/winfx/2009/xaml"
xmlns:local="clr-namespace:MyPopupDemo"
x:Class="MyPopupDemo.MainPage">
<StackLayout>
<Label Text="Pop Up Demo" Font="Bold,24"
VerticalOptions="CenterAndExpand" 
HorizontalOptions="CenterAndExpand" />
<Button VerticalOptions="StartAndExpand" 
HorizontalOptions="CenterAndExpand" 
Text="Popup"
Font="Bold,20"
Clicked="Button_Clicked"
BackgroundColor="Aqua"/>
</StackLayout>
</ContentPage>


Then write code for popup navigation..

private async void Button_Clicked(object sender, EventArgs e) { await PopupNavigation.PushAsync(new ShowPopupDemo()); }


Step-3
Now we are creating ShowPopupDemo.xaml for creating popup..
<?xml version="1.0" encoding="utf-8" ?>
<pages:PopupPage xmlns="http://xamarin.com/schemas/2014/forms"
xmlns:x="http://schemas.microsoft.com/winfx/2009/xaml"
x:Class="MyPopupDemo.ShowPopupDemo"
xmlns:pages="clr-namespace:Rg.Plugins.Popup.Pages;assembly=Rg.Plugins.Popup"
xmlns:animations="clr-namespace:Rg.Plugins.Popup.Animations;assembly=Rg.Plugins.Popup"
BackgroundColor="Transparent">
<pages:PopupPage.Animation>
<animations:ScaleAnimation 
PositionIn="Center"
PositionOut="Center"
ScaleIn="1.2"
ScaleOut="0.8"
DurationIn="400"
DurationOut="300"
EasingIn="SinOut"
EasingOut="SinIn"
HasBackgroundAnimation="False"/>
</pages:PopupPage.Animation>
<StackLayout VerticalOptions="Center" Padding="20,0" HorizontalOptions="FillAndExpand" >
<Frame CornerRadius="10" Padding="0" BackgroundColor="CadetBlue" >
<StackLayout Padding="10">
<Label Text="First Popup Page" TextColor="Black" FontSize="20" HorizontalOptions="Center"></Label>
<ScrollView>
<StackLayout>
<Label Text="Hello Xamarin Guys" TextColor="Red"/>
<StackLayout Orientation="Horizontal">
<Label Text="This is Very Awesome Popup Plugins For Xamarin forms" TextColor="LightBlue"/>
<Button Text="Close" TextColor="Black" Clicked="Button_Clicked" ></Button>
</StackLayout>
</StackLayout>
</ScrollView>
</StackLayout>
</Frame>
</StackLayout>
</pages:PopupPage> 


Now we are coding in C#
  private async void Button_Clicked(object sender, EventArgs e)
{
await PopupNavigation.PopAsync(true);
}


TADDA!!!!!!!!!!!!!!
My Popup Page is working… :)


If you want to full source code click Here
and video url click Here

If you are lazzy download click here  

If you want to watch this video, Click here 
=============================================================
Rg.Plugins.Popup Override Methods

        //Methods for supporting animations in your popup page
        // Invoked before an animation appearing
        void OnAppearingAnimationBegin()
=============================================================      
        // Invoked after an animation appearing
        void OnAppearingAnimationEnd()
=============================================================
        // Invoked before an animation disappearing
         void OnDisappearingAnimationBegin()
=============================================================
        // Invoked after an animation disappearing
         void OnDisappearingAnimationEnd()
=============================================================
         // Invoked  Async
         Task OnAppearingAnimationBeginAsync()
         Task OnAppearingAnimationEndAsync()
         Task OnDisappearingAnimationBeginAsync()
         Task OnDisappearingAnimationEndAsync()
=============================================================
        // Override methods which can prevent closing a popup page

        // Invoked when a hardware back button is pressed
         bool OnBackButtonPressed()   ============================================================
        // Invoked when background is clicked
         bool OnBackgroundClicked()
       

Sunday, 25 March 2018

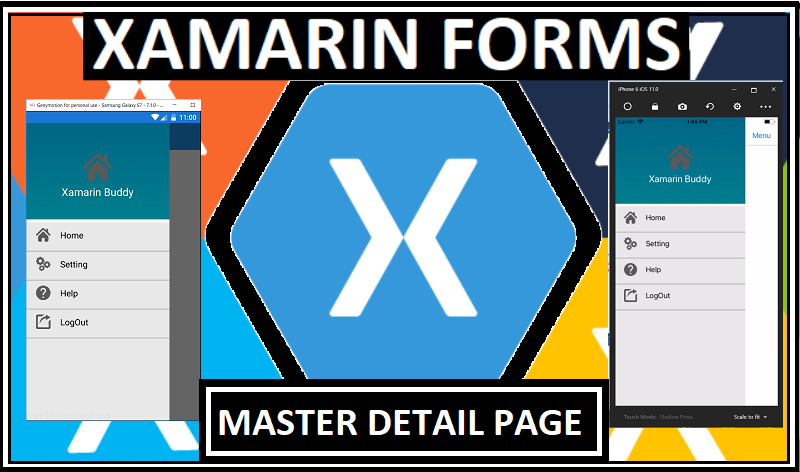
Xamarin.Forms (Dynamic)MasterDetailPage


Introduction678:-

IHi everyone this article demonstrates how to create and use a Dynamic Master-Detail-Page in Xamarin.Forms, XAML, and C#. This article starts with the introduction of the Master-Detail-Page tag in XAML.


Dear friends today I am going to tell you about master-detail page. friends I have faced so many problems while creating master-detail page.
After a long struggle, I come up with some easy step to create master detail page. Before moving towards implementation let's have a short detail about the terms.
The master-detail page is a page in which we are creating menus to navigate through the application Like (Home,Setting,About,Help,Logout)Etc…
Master-detail menus are generally used in most of the mobile application it looks attractive also.
We can customize the master-detail page in our own way, and make it attractive.


Let's begin ………..
Definition:-
Master-Detail Page: - A page that displays the information in two parts, higher level and lower level.
In Simple Way:-
Master-detail page contains two things, one is master and another is detail page.
A master page contains the menu list and the detail page, that display the details and provide the link to go back to the master page.
The detail page is content holder that can hold another page which is linked to the master page’s menus. 


Implementation:-
 Open Visual Studio and select a New Project.


Now, select Cross-Platform App, give project name and set the project path. Then click OK.
Select the template as "Blank App" and code sharing as "PCL".

Step-1

Create a folder which is name as MenuItems and Views.


Right-click on MenuItems folder and select Add >> New Item or Add >> Class. 


Step-2

We create a class MasterPageItem.cs and write the following C# code.
MasterPageItem.cs
public class MasterPageItem 
{
public string Title { get; set; }
public string Icon { get; set; }
public Type TargetType { get; set; }
}

Step-3

In Views folder, you can create three pages to navigate through detail page.(Ctr+Sht+A is short cut key for add New Items) .

Like this =>

1.    Home Page
2.    Setting Page
3.    Help Page
4.  Logout Page

Step-4


Now,  we  will set up Main Page for the master-detail page and set the list view on the mater detail page.

<MasterDetailPage xmlns="http://xamarin.com/schemas/2014/forms"
             xmlns:x="http://schemas.microsoft.com/winfx/2009/xaml"
             xmlns:local="clr-namespace:XFMasterDetailPageNavigation"
             x:Class="NavigationMasterDetail.MainPage">
    <MasterDetailPage.Master>
        <ContentPage Title="Menu">
            <Grid BackgroundColor="Transparent">
                <Grid.RowDefinitions>
                    <RowDefinition Height="200" />
                    <RowDefinition Height="*" />
                </Grid.RowDefinitions>
                <Grid>
                    <Image Source="bg.png" Aspect="AspectFill" />
                    <StackLayout Padding="0,20,0,0" HorizontalOptions="CenterAndExpand" VerticalOptions="CenterAndExpand">
                        <Image Source="profile.png" Aspect="AspectFill" WidthRequest="85" HeightRequest="85" />
                        <Label Text="Xam Buddy" TextColor="White" FontSize="Large" />
                    </StackLayout>
                </Grid>
                <StackLayout  Grid.Row="1" Spacing="15">
                    <ListView x:Name="navigationDrawerList"
                  RowHeight="60"
                  SeparatorVisibility="None"
                  BackgroundColor="#e8e8e8"
                  ItemSelected="OnMenuItemSelected">
                        <ListView.ItemTemplate>
                            <DataTemplate>
                                <ViewCell>
                                    <!-- Main design for our menu items -->
                                    <StackLayout VerticalOptions="FillAndExpand"
                             Orientation="Horizontal"
                             Padding="20,10,0,10"
                             Spacing="20">
                                        <Image Source="{Binding Icon}"
                         WidthRequest="40"
                         HeightRequest="40"
                         VerticalOptions="Center" />
                                        <Label Text="{Binding Title}"
                         FontSize="Small"
                         VerticalOptions="Center"
                         TextColor="Black"/>
                                    </StackLayout>
                                </ViewCell>
                            </DataTemplate>
                        </ListView.ItemTemplate>
                    </ListView>
                </StackLayout>
            </Grid>
        </ContentPage>
    </MasterDetailPage.Master>
    <MasterDetailPage.Detail>
        <NavigationPage>
        </NavigationPage>
    </MasterDetailPage.Detail>
</MasterDetailPage>
Please make sure of the Menu title name………

Step-5

Now, write some code in Master Page 

using System;


using System.Collections.Generic;
using System.Linq;
using System.Text;
using System.Threading.Tasks;
using Xamarin.Forms;
namespace XFMasterDetailPageNavigation {
    public partial class MainPage : MasterDetailPage {
        public List<MasterPageItem> menuList { get; set; }
        public MainPage() {
            InitializeComponent();
            menuList = new List<MasterPageItem>();
            // Adding menu items to menuList and you can define title ,page and icon
            menuList.Add(new MasterPageItem() { Title = "Home", Icon = "home.png", TargetType = typeof(HomePage) });
            menuList.Add(new MasterPageItem() { Title = "Setting", Icon = "setting.png", TargetType = typeof(SettingPage) });
            menuList.Add(new MasterPageItem() { Title = "Help", Icon = "help.png", TargetType = typeof(HelpPage) });
            menuList.Add(new MasterPageItem() { Title = "LogOut", Icon = "logout.png", TargetType = typeof(LogoutPage) });
            // Setting our list to be ItemSource for ListView in MainPage.xaml
            navigationDrawerList.ItemsSource = menuList;
            // Initial navigation, this can be used for our home page
            Detail = new NavigationPage((Page)Activator.CreateInstance(typeof(TestPage1)));
        }
        // Event for Menu Item selection, here we are going to handle navigation based
        // on user selection in menu ListView
        private void OnMenuItemSelected(object sender, SelectedItemChangedEventArgs e) {
            var item = (MasterPageItem)e.SelectedItem;
            Type page = item.TargetType;
            Detail = new NavigationPage((Page)Activator.CreateInstance(page));
            IsPresented = false;
    }
}
TADDA!!!!!!!!!


I hope that you like this type of navigation drawer (master-detail page) in your Xamarin.Forms App.


Happy Coding J
[\{}|A:CM<?

If you are lazzy download click here 

If you want to watch this video, Click Here 

Saturday, 24 February 2018

Xamarin Forms ReturnType Key


Introduction:-
Hello Everybody Today I am going to tell about Entry Key ReturnType and How to change ReturnType keys like Search, Done and etc.
So In this article, I am using Xamarin Forms “PORTABLE" and XAML. this Handles Keyboard return a key description.

We generally found different caption on return type key while we are using keyboard in the mobile App. So, here I mentioned the way to achieve the different behaviors of return type keys in Xamarin Forms.

To customize return type key in android and ios we have to set following properties.

In iOS: UITextField has a ReturnKeyType property that you can set to a preassigned list.
In Android: EntryEditText have an ImeOptions property this property help to changing the EditText Key for Keyboard button.


Implementation:-
We are creating a class CustomKeyEntry.cs in PCL Project and writing the following C# code.
CustomKeyEntry.cs 

This property is set in the Android project as well as in iOS project.
Let us start with Android. We are creating a Class in Android Project and rendering the entry. 
Then, we set all the properties when initializing the PCL Project. 
Please make sure of the dependency ([assembly: ExportRenderer(typeof(CustomKeyEntry), typeof(CustomKeyEntryRenderer))]) of Android(CustomEntryRndered) and PCL(CustomEntry)…

CustomKeyEntryRenderer.cs

Now, it's time to go with iOS project.And we  set the PCL(CustomEntry) property in IOS Project….
 We are creating a Class , so we are  right click on iOS Project and select Apple. Then, select "Class" and give this class a name as CustomEntryRendered.cs.
[assembly: ExportRenderer(typeof(CustomKeyEntry), typeof(CustomKeyEntryRenderer))]
Now, let us write some code for Entry and Set Property.

CustomKeyEntryRenderer.cs

Now, go to the PCL Project and write this code in MainPage.xaml.
As you can see in the above code, we have to set the view reference in xmlns:custom="clr-namespace:CurvedEntry" MainPage.xaml.
Write the following code for CustomEntry.

MainPage.xaml

TADDAAAA!!
Now, you will have your Custom Entry working!!

if you want to watch this video click Here

Features of CustomReturnType controls

Custom ReturnType Property=(ReturnType="Search")

Sunday, 14 January 2018

Xamarin.Forms Blurred Image


 Introduction:-
 The image is an input control that can be used to make our UI design more user-friendly and attractive. "Image is representational of the external form of a person or thing in art" So today we have the effect of the blurred image in Samarine forms And how do we blurred the effects of the blurred image in Android and iOS.

This article demonstrates how to create and use a blurred image in Xamarin.Forms, XAML, and C#. This article starts with the introduction of the BlurredImage tag in XAML.
 BlurredImage in Xamarin
Implementation:-
Open Visual Studio and select a New Project.

BlurredImage in Xamarin

Now, select Cross-Platform App, give the project a name, and set the project path. Then, click OK.
BlurredImage in Xamarin
Select the template as "Blank App" and code sharing as "PCL".


BlurredImage in Xamarin

Right-click on PCL Project and select Add >> New Item or Add >> Class.

BlurredImage in Xamarin

We are creating a class BlurredImage.cs and writing the following C# code.
BlurredImage in Xamarin

This property is set in the Android project as well as in iOS project.
Let us start with Android. We are creating a class in Android project and rendering the image.
BlurredImage in Xamarin
 Then, we set all the properties when initializing the PCL Project.
BlurredImage in Xamarin
Please make sure of the dependency ([assembly: ExportRenderer(typeof(BlurredImage), typeof(BlurredImage Renderer))]) of Android (BlurredImageRndered) and PCL (BlurredImage).
BlurredImageRenderer.cs
Now, it's time to go to the iOS project. Again, set the PCL(BlurredImage) property in IOS Project.
We are creating a Class, so right click on iOS Project and select Apple. Then, select "Class" and give this class a name as BlurredImageRndered.cs.
BlurredImage in Xamarin
Now, let us write some code for Image and Set Property.
BlurredImageRndered.cs
Go to the PCL project and write this code in MainPage.xaml.
BlurredImage in Xamarin

As you can see in the above code, we have to set the view reference in xmlns:custom="clr-namespace:BlurImage" MainPage.xaml.
Write the following code for BlurredImage.
MainPage.xaml
TADDAA!!


Now, you will have your BlurredImage working!!
Public Property Image controls
  1. Image="Imag eis reprasantational of exteranal form of a person or thing in art"
  2. Aspect    Aspect=(Aspect="AspectFill")
  3. IsOpaque    Boolean=(IsOpaque="True")=if true hints to the rendering engine that it may safely omit drawing visual elements behind the image.
  4. Source    ImageSource=(Source="icon")

Monday, 8 January 2018

Xamarin.Forms Custom Switch Button

 Hello Xamarians,
I am here with a new blog on Switch button. As you all know what is switch button and how it works. For example in general terms we have switch button for fan and it is used to mak fan tun on and off. Similary, in Xamarin form we have switch button to trun on and off the feature.


In Android, Ios and WPF  switch button is a UI widget to enable and disable some operations.
Switch button is also knows as flip flop.

In xamarin form we can customize the behavior of  switch button. Along with this we can also rendered the Android and IOS Properties of switch button.

Let's start with the implementation:


we will first create a class whose name is "CustomSwitch" and then we will write a code in "C #"

Now we can set properties in android project which is generated from PCL Project, also set properties in Ios Project.

Please make sure and add view reference.. 
xmlns:local="clr-namespace:CustomSwitchApp"then write xaml code in main page.

Now we are using custom switch control in PCL Project..
TADDAAAA!

You should have your CustomSwitch working!!
If You want to watch related video click Here Custom Rendered Switch


Publi Property of Switch Button controls
  1. IsToggeled Boolean=(IsToggeled="True")
Features of CustomSwitch controls
  1. Custom Switch On Color Property=(SwitchOnColor="Red")
  2. Custom Switch Off Color Property=(SwitchOffColor="Yellow")
  3. Custom Switch Thumb Color Property=(SwitchThumbColor="Yellow")
  4. Custom Thumb Image Property=(SwitchThumbImage="Black")


Featured Post

Sliding Entry In Xamarin.Forms

  Today, I am going to show you how to create a Custom Slide entry in Xamarin.Forms with animation and also using gradient color. here is Y...